Cooking

Vanilla Almond Granola

Easy to make and delicious Vanilla Almond Granola! It is surprisingly easy to make. What took me so long to try?!

Whisk together coconut oil and syrup until well combined.

Make sure the oats are evenly coat.

Spread it evenly on the pan before baking. Stir to ensure the granola is baked evenly, every 15 mins.

Vanilla Almond Granola

Ingredients:

2½ cup or 200g rolled oats

¾ cup silvered almonds

½ tsp cinnamon

1/8 tsp salt

½ cup maple syrup (substituted with golden syrup)

¼ cup coconut oil

¼ tsp almond extract (omitted)

1 tbsp vanilla extract (yes, 1 tablespoon)

Method:

  1. Preheat oven to 300oF or 150oC. Line baking pan with baking paper.
  2. Toss oats, almonds, cinnamon, salt together. Set aside.
  3. Whisk syrup, coconut oil till combined.
  4. Whisk in almond extract and vanilla extract.
  5. Pour the wet ingredients over oats mixture and toss to coat evenly, making sure all oats are moistened.
  6. Spread it on the baking sheet, and bake for 45min, stirring every 15min.
  7. Allow granola to cool completely so that it will be crunchy.
  8. Keep in airtight container for up to 3 weeks, at room temperature.

Notes:

  • It is a scale down from the original recipe, and it fits my baking pan just nice. So it depends on the size of your own baking pan.
  • I used a combination of sliced almonds and diced almonds because that’s what I have on hand. I find that sliced almonds are good as it is thin and crunchy after baking, giving the finished product more “dimension”.
  • I omitted almond extract as I finished it. The granola was still good.
  • Substituted maple syrup with golden syrup. Yea.. I am making it more unhealthy so called. But I think that both are sugars, and downing too much maple syrup is equivalent to overdose of sugar too. Besides, it was practical for me because I could not think of a better way to finish up my golden syrup. End product was good, maybe better because golden syrup is thicker and sweeter compared to maple syrup. Just eat in moderation. J
  • Stirring every 15 min is absolutely important, especially that I used almond flakes, which are thin. Some almond flakes were still burnt.
  • It is absolutely delicious and easy to make.


No bake Peanut Butter Cookies

I am trying.. to prepare more food that I can bring on the go, as my new workplace is horrendously inaccessible and far, with

not many food choices that suits me. (There is only one canteen.)

Close-up texture of the cookies

Anyway, I found this recipe on Tone It Up. If u are female and trying to “Tone It Up”, u won’t regret popping over to take a look. The site is managed by two gorgeous women who are fitness trainers and decided to start a community where women can encourage each other to become healthy and fit. There are plenty of FREE articles for exercise routines, recipes, motivation, etc.

The recipes they provide are pretty simple, delicious and healthy. I have reached an age whereby I can feel it if I drank too much the previous night, or if I don’t sleep properly for 2 days. I just feel, I can’t go on living the way I lived. I NEED to CHANGE. So, I found their site by chance and it has become my new hobby. Hope things turn out well 🙂

I was just lazy to sift the cocoa powder, so I had to do extra work trying to let it all well mixed using two spoons (refer to next picture). Recommended: Sift the cocoa powder first.

Make sure everything is well mixed.

Mix well, and fast, as the oats “soak” peanut butter dry too fast.

After 20 minutes??

Ingredients

    • 1/3 cup honey
    • 1/2 cup almond milk
    • 3 to 4 tbsp cacao powder
    • 1/2 cup peanut butter (no-sugar added, natural peanut butter)
    • 3 cups oats
    • 1 scoop vanilla or chocolate Perfect Fit protein powder

Method

  1. Heat honey, milk, cacao powder over medium heat till boiling.
  2. Add peanut butter, oats and protein powder. Mix well.
  3. Form into cookies, place on wax paper. Refrigerate until set.

Notes

  • Sift the cocoa powder first, so that it can mix well with the other ingredients.
  • Shaping into energy balls or bars is easier, I find. It’s really up to u. What shape and size, it doesn’t matter.
  • Used skimmed milk instead of almond milk
  • Rolled oats were used.
  • The end product was just sweet enough for my liking, but maybe not sweet enough for general public who are desensitized by too much sugar in the daily food. (Plus, I added extra cocoa powder so it is even less sweet. It did not turn out too crumbly because I only add a little extra.)
  • It is good to know that the peanut butter should not be too dry otherwise it will be harder to mix. (I did not mix properly and took some drier portions of the peanut butter).

Peanut cookies


I first tried this recipe 3 years back, after founding the recipe on Bread Et Butter. I liked how she presented it with the simple 2:2:1:1 ratio. (2 cups peanut: 2 cups flour: 1 cup icing sugar: 1 cup oil) Voilà! I loved peanut cookies and was amazed how simple it was. No weighing scale needed (unless if u need to weigh out the balls for business purposes).

Peanut cookies are easy to differentiate from the white almond cookies. But anyway, I took extra effort to make it look like golden coins (ancient Chinese coins look like that). Did not apply the egg wash evenly.

The peanut cookie dough was extremely cohesive. It was the easiest to make as compared to almond cookies, especially the crunchy almond cookies, which requires “extra squeeze” to make the dough come together.

I used a chopstick with square ends to gently push the middle to create “coin shape”.  The one at bottom right was leftover dough, about 5g instead of 8g.

I purposely left some of it with the bubbles from egg wash. It all dissipated with baking. (e.g. second one from bottom left) Without egg wash, the taste was not very different.

Finished product.


Peanut cookies

Makes 60-65 cookies, 8g each.

 Ingredients:

1 cup ground peanut (~125g)

1 cup flour (~125g)

½ cup icing sugar (67.5g)

½ cup oil (67.5g)

Method:

The ratio of peanuts: flour: icing sugar: oil = 2:2:1:1.

Mix all dry ingredients together. Add in oil and mix well. It should form cohesive dough (not crumbling). Form dough into small balls, 7-8g each. Glaze with beaten egg. Bake at 180oC, 15-20 min.

Notes:

  • The dough for peanut cookies are much more cohesive than the almond cookies (both types), thus easier to handle.

I am submitting this post to “My Treasured Recipes #5 – Chinese New Year Goodies (Jan/Feb)” hosted by Miss B of Everyone Eats Well in Flanders and co-hosted by Charmaine of Mimi Bakery House.

Traditional Almond Cookies

This was really fragrant. Even my grandma (who does not eat CNY cookies as she is afraid of butter) says its nice! She ate three. Nice feat. I took it out to let everyone try during the reunion dinner at Grandma’s house and all of them except one liked it, to my delightful surprise. One of my uncles can’t stop at one and specifically requested to grab the container of cookies I gave Ah-mah (grandma) and kept popping into his mouth right after dinner. He liked it so much he wanted to order. But I have no time for that cos CNY was next day!

Moreover I made a mistake by using the fine grain table sugar as it was too late to get caster sugar anyway (most shops were already closed when I started baking).  I thought the sugar would melt with high oven temperature, but it did not. If u want the sugar crystals to blend in better, use caster sugar (super fine grain, specifically for baking). Some people like the sugar crunch though.

Nevertheless, I looked for ways to solve the crystal problem. I want to find a recipe which creates melt-in-the-mouth-even-more almond cookies. I found one using icing sugar in much less quantity, which I had thought of after baking the first batch, but threw the idea out as I was not sure how the cornstarch content will affect the product. Maybe next year.

It looks similar to the crunchy melty almond cookies I baked earlier, but that’s just the original colour of almond cookies. The yellow colour saw in stores were bestowed by egg wash, which has to be omitted because my friend’s wife is vegetarian.

1 batch makes about 60-65 cookies, 8g each. Slightly more cookies than required to fill one container. I used a medium large container. This “business” was no easy task. Hourly pay could be $5 or less, depending on various factors. But the bonus is, I get to do the things I like.

Cooling on a rack immediately after baking. My oven pan was too hot and the bottom got slightly burnt. On the upside, there was a nice “burnt taste” if u know what I mean.

Traditional Almond Cookies

Makes 60-65 pieces, 8g each

 Ingredients:

120g ground almond

95g caster sugar

180g flour

1 tsp baking powder

1 tsp baking soda

¼ tsp salt

122ml oil

1 egg yolk

Method:

Sift flour, baking powder, baking soda, salt together. Mix well with almond. Incorporate oil into the dry mixture and stir quickly. Roll into small balls of 7-8g each (about 1 tsp). Bake at 180oC, 18 min or lightly browned.

Notes:

  • Bought the wrong type of sugar, the fine grain table sugar. It did not melt fully in the finished product. Some people like the “crunch” sugar crystals gave. I think it’s a blessing in disguise, but if I bought the normal table sugar (coarse grain), then people will probably shun the cookies.
  • Baking at 180oC for 18min results in slightly overbaked cookies. Anyway baking temperatures and timing in recipes are mere guidelines. Every oven is different. My oven pan tends to be very hot and I think that’s why cookie bottoms were slightly burnt. I ended up baking for 15min. No burnt taste but slightly less fragrant overall.

I am submitting this post to “My Treasured Recipes #5 – Chinese New Year Goodies (Jan/Feb)” hosted by Miss B of Everyone Eats Well in Flanders and co-hosted by Charmaine of Mimi Bakery House.

Crunchy Almond Cookies

Recipe at end of page

I first started baking these Chinese New Year goodies 3 years back, armed with a curiosity for “How are my beloved CNY goodies made?”. I explored my favourite peanut cookies and almond cookies, and the classic pineapple tarts. And I was tired enough. My family was intrigued by the process of making the cookies, which was something new to us, and everyone was eager to try the product. My mum was pretty impressed and decided to order 10 containers of peanut cookies and almond cookies each for her friends, despite that she did not like people “messing” her kitchen. She paid for the ingredients while I do the things I like.

That was a busy year.

While looking for recipes, I chanced upon this recipe, Crunchy Melty Almond Cookies by j3ss kitch3n. Her description of the cookies and the way she presented in pictures were so tempting, that I knew I had to try it. I baked about 10 containers of cookies (in addition to the 20 my mum ordered) for my friends and then-boyfriend. The response was overwhelming. Everybody likes it. I continued to bake for free the next two years.

This year, my house was chosen for the Home Improvement Program just one week before Chinese New Year. Great. I decided not to bake anything. Moreover, I quitted my job which I had thought of leaving for years. It was not wise to spend too much. Some of my friends were the most supportive people ever. During a meetup in Jan for a friend’s birthday, I announced the quitting of my job, and they started to come up with ideas to earn money for me. The group unanimously suggested me to sell my CNY cookies since CNY was around the corner. They thought the cookies were good and one of them even wanted me to bake some samples to bring to office so she could help me promote. Very enthusiastic of them. I did not follow up as I knew mum would be upset as after HIP she would need the kitchen too.

Somehow, I ended up taking orders and occupied the kitchen while mum was doing her CNY shopping (with her consent of course).

After a few years of practice, I have become better at moulding the cookies. I figured if I wanted to make it a business, this is a good time to put it to test. I also need to be precise in every step, from the sources of ingredients and containers, price (good quality and not too expensive), size of cookies, rather than using my freestyle methods to estimate. This time, each cookie weighs 8g (+/- 0.5g as my weighing scale rounds to the nearest whole number). Why 8g? I think its a lucky number 🙂

Mix all the dry ingredients together. Incorporate the oil and mix it fast. It may look crumbly but when u pushed the dough with the back of spoon, the dough comes together. I never have to add extra oil.

My uncle was horrified when he saw the cookies on the left. I told him it was work of art. Just kidding. It was easier to weigh out the 8g each, before shaping into neat balls (picture on the right).

Finished product

The cookies were crunchy and slightly “fluffy” when hot from the oven

Crunchy Almond Cookies

makes approximately 60 cookies, 8g each

Ingredients:

150g self-raising flour

80g icing sugar (reduced to 60g)

80g diced almond (blanched)

80g ground almond (blanched)

100ml corn oil

½ tsp almond essence (omitted)

Egg yolk for brushing (omitted)

Method:

Sift flour and sugar together. Add almonds and mix well. Mix almond essence to corn oil and stir well. Mix both wet and dry ingredients to form a soft dough. Shape into small round balls and place in paper casing. Bake at 170oC, for 15-20 min or till slightly brown.

Notes:

  • You can make the self-raising flour as shown. Self-raising flour recipe:

1 cup flour (125g)

¼ tsp salt

1½ tsp baking powder

  • Even with reduced amount of sugar (60g instead of 80g), there are people who still find it too sweet. Majority thinks the sweetness is acceptable though.
  • Toasting the diced almond before mixing might give a better flavor.
  • Without almond essence, almond taste is still strong. It is quite good as almond essence gives an artificial taste sometimes.
  • Using oil with neutral taste like corn oil or grapeseed oil is preferable to those with strong flavour like olive oil.


I am submitting this post to “My Treasured Recipes #5 – Chinese New Year Goodies (Jan/Feb)” hosted by Miss B of Everyone Eats Well in Flanders and co-hosted by Charmaine of Mimi Bakery House.


Classics: Chocolate chip cookies

Crunchy chocolate chip cookies (pardon for poor lighting)

soft chocolate chip cookies. (10 min baking time)

I first made this classic in 2010. Found it in

All Recipes is my favourite recipe site because the recipes were contributed by real people who tried it and reviews by people who also tried it. Its almost foolproof. This particular recipe is by Dora and has over 6000 positive reviews.. I knew I gotta try it.

As it would be the last Christmas cookies I bake for my colleagues, I decided to do the same cookies again. But when my sis saw the soft cookies, she commented that most people would prefer crunchier ones. True. So I Increased baking time and my colleagues seemed to prefer it over soft ones anyway. Enjoy! 🙂

I mix it with two spoons.

not smooth I know..

After adding eggs.

Add in flour, chocolate chips and walnut. Mix well.

Flatten slightly. Bake for 10 or 20min, depending on the texture desired.

Ingredients:

225g butter

200g white sugar (reduced to 50g)

220g packed brown sugar (reduced to half)

2 eggs

10ml vanilla extract (2tsp)

375g flour

5g baking soda (1 tsp)

10ml hot water (2 tsp)

3g salt (1/2 tsp)

335g chocolate chips (semi sweet)

115g chopped walnuts

  1. Preheat oven to 175oC.
  2. Cream butter and sugars till smooth. Beat in eggs one by one. Stir in vanilla extract.
  3. Dissolve baking soda in hot water. Add to mixture, together with salt.
  4. Sift in flour. Add chocolate chips and nuts. Mix well.
  5. Drop by spoonfuls onto ungreased pans (flatten slightly for crunchier result)
  6. For soft cookies: Bake 10min or until edges are browned.
  7. For crunchy cookies: Bake 20-22min or until the cookies are brown.

Notes:

  • Baking time determines whether it is a soft or crunchy cookie. Increase by twice as much time for cookies with a crunch.
  • Did not read carefully and added salt to flour instead. Not a big impact I guess.
  • Cookie will slightly spread but flattening it will produce a more evenly spread and crunchier cookie.
  • Baking it for too long will result in an overbaked product – the cookie will taste slightly bitter. But most people will enjoy it anyway. Only the most picky tastebuds will be able to tell. Most people around me prefer crunchy cookies.
  • The chocolate chips are way too much. Semi sweet (Hersheys) is still too sweet. Reducing it by half is a good idea.
  • Reduced white sugar as I ran out of it. Brown sugar was weighted loosely instead of “packed”. It was still too sweet for some people. Could reduce sugar content further, but not sure how it might affect the outcome other than sweetness.

Chocolate snowskin mooncakes

Mooncakes again?? I know.. I have been making lots of mooncakes.. This is post-dated but made before the festival for giveaways. I bought too many packets of paste this year on my second trip to Kwang Cheong Thye. Seriously… do I even need to mention their name so many times? Lol.. It is just a paradise for mooncake making. All kinds of ingredients, packagings, equipments… Next year, go there if u want to make mooncakes. Otherwise, they sell good soya sauce too. (That’s what they are famous for actually.)

These chocolate snowskin mooncakes is a different twist from the other traditional kinds. No traditional flavours at all. No shortening (thankful the recipe by Baking Scientist). She made these lovely (and delicious) mooncakes this year too. I referred to both recipes and wrote down mine. It is almost the same as her recipe except for the cocoa powder and 86% chocolate. I personally do not like too-sweet. The passionfruit paste tastes nice but it smells so sweet while making the mooncakes I feared I will be attacked by ants army anytime.

This recipe is good for moulding. Just make sure to dust with a lot of flour, on the hands, dough and mould while handling) as it tends to be more sticky (not as much as coffee snowskin though. It is also very pliable and good for wrapping. With sufficient koh fun for dusting, moulding is easy. Stays soft in the fridge in air tight container without thawing, unlike the coffee snowskin which requires leaving at room temperature before serving.

I weighed the chocolate into a metal bowl and put the bowl in a pot of boiling water to melt. Do not stir as it could get more  bitter.

chocolate snowskin 4

Ingredients (13 pieces, 55g each)

130g water

50g melted chocolate (86% cocoa dark chocolate – Cote D’Or)

10g cocoa powder (Hershey’s)

64g koh fun (fried glutinous rice flour)

80g icing sugar

9g oil


Filling:

390g passionfruit paste, from KCT.


Koh fun for dusting


Method

  1. Sift and mix all dry ingredients together.
  2. Mix melted chocolate, oil, water in another bowl.
  3. Make a well in the dry ingredients, Pour in wet ingredients. Stir and mix in quickly in one direction.
  4. Knead the dough till smooth and not sticky.
  5. Weigh out 25g dough and roll into a ball.
  6. Weigh out 30g filling and roll into ball.
  7. Wrap filling in flattened dough and press into mould, taking care of the edges. Unmould. Store in airtight container in fridge.


Notes:

  • Forgot to sift cocoa powder. Just make sure there are no lumps.
  • Original recipe calls for 70% cocoa dark chocolate and no cocoa powder. I think it does not make much difference. I just prefer less sweet. Did not want to reduce the sugar too much as I feared that would affect pliability. This level of sweetness is acceptable but the sugar level can still be reduced. I think that’s because the paste was really sweet. Try 90% cocoa next year? Lol… or change the paste.
  • Mix quickly as the dough forms very fast.
  • Not much kneading required actually.
  • Dust with a lot of flour.

Coffee Snowskin mooncakes

variation: with cream cheese. Mooncake looks like “kueh” if not enough flour is used for dusting

This is the first recipe I used without using koh fun (fried glutinous flour) and shortening. It is adapted from Christine’s recipe. I was just trying out alternatives – sure I can try to fry my own glutinous rice flour. Next year maybe.. lol.. too much mooncakes this year.

What’s all this mooncake fuss about? Mid-autumn is coming. It is a Chinese festival that falls on the 15th Aug of lunar calendar (lunar calendar was in use before modern times). As associated with all festivals, food is involved.. As time passes, variations of the original evolved. Snowskin is one of them..

I personally like this coffee paste very much and wanted to make a soft snowskin to match it. Freshly made, it was pretty good. But the snowskin could not withstand the fridge storage even in airtight container. Leaving it out in room temperature for some time before serving helps a little, but storage no more than 3-4 days probably. The mango snowskin made earlier was even softer than this. Storage-wise, mango snowskin wins hands down. It could be stored longer, and also not too sticky to the container. Alan Ooi’s recipe was good also. Storage was easy, it does not leak, taste ok, but I did not like that raw shortening was used. (many commercial snowskin mooncakes uses raw shortening btw)

I think it looks more “kueh” than snowskin if you do not dust with much flour. In fact, this recipe would hv made decent kueh on its own IMHO.

Overall, this recipe is good for consumption on the day it is made, without putting into fridge. It is also too much trouble, to steam and scrape and knead.. lol.. sometimes I just want a no-fuss recipe. Taste-wise I would say its pretty good. But I would prefer to not go into so much trouble just to make these.

2 kinds of flour.

Combine wet ingredients. Used low-fat milk. wondered if it caused the mooncakes to be on the harder side.

Mix with combined dry ingredients.

Sieve into a large and shallow pan

Remove from wok and allow to cool. Frankly, I think this “kueh” can be eaten on its own. Tastes pretty good actually. I might make this just to eat this.

Scrap it onto tabletop and knead into dough.


Ingredients (18 pieces, 55g each)

55g glutinous rice flour

45g rice flour

25g wheat starch

60g caster sugar

190ml milk

30ml condensed milk

25ml vegetable oil

40ml coffee (40ml water +1tsp freee-dried coffee granules)

Some koh fun (fried glutinous rice flour) for dusting


Filling

500g coffee red bean paste; 30g x 14 & 20g x 4

40g cream cheese


Equipment

55g mooncake mould


Method

  1. Combine sifted flours and sugar. Mix well.
  2. Mix milk, condensed milk, coffee and oil. Pour into flour. Stir to combine. Drain through a sieve into a large and shallow pan.
  3. Steam over medium high heat for 15-20min. Try some steamed pastry to ensure it does not taste raw. Remove from wok and allow cooling.
  4. Scoop dough onto tabletop and knead lightly till smooth. Divide into 25g each
  5. Divide filling into 30g x 14 pieces, 20g x 4 pieces. Shape into balls.
  6. Divide cream cheese into 10g each. Flatten the 20g filling and wrap cream cheese in it. Roll into balls.
  7. Wrap the fillings into dough, mould, and store in airtight container in fridge.


Notes:

  • Dough sticks to metal surfaces (weird?) but not plastic sheets. Use plastic sheets to cover working surface.
  • Extremely sticky dough for working with, moulding etc- requires lots of dusting flour. Even more than the mango snowskin
  • Cream cheese improves the overall taste I find. It counteracts the sweetness. But 10g is a lot. Maybe can experiment with 5-8g next time.

Snowskin mooncake – ice cream soda recipe

My previous attempt on snowskin mooncakes was pretty satisfying actually, especially after the ego boost by patrons at my friend’s housewarming party. One girl actually could not resist the mooncakes. She find it that good. But, given my nature, I still want to try out more recipes, that might give me better results.

I first made snowskin mooncakes last year, but sadly the mooncakes turned very hard the second or third day in the fridge. Well it might be storage fault too since I did not put it in airtight containers. Nevermind, life is a continual learning journey. This year, I store all my mooncakes in airtight containers before putting into the fridge and most stayed soft for at least 3 to 4 days. I keep coming across this recipe by Aunty Yochana, a very popular blogger good at making various pastries, cakes etc.

The recipe was really soft. In fact, too soft. I was not very happy with the result, probably also because I know deep down how unhealthy it is, using ice cream soda – which I do not usually consume. The recipe is ok, but it just boils down to preferences. Why did I make it in the first place? Interesting. I merely wanted a recipe that produces soft mooncakes, and out of curiosity. Then I realised it was not for me. I think it correspond to many areas in life.

Anyway, not a lot of people dared to touch the mooncakes. They do not know what’s inside (like me, my family do not like soft drinks). It’s probably hunch. lol.. Even in the office.

I substituted 100ml of ice cream soda with pink guava juice, in an attempt to get pink colour. Disappointing as I did not know that the pink will turn out so diluted. Does it even look pink?

After days, the mooncakes still stayed soft (so does my previous recipe made few days back). But I suspect ice cream soda is the culprit for making it so soft that it leaks after a few days in fridge. Yes, the mooncake leaks. It is not the common dry and soft snowskin. It is “raining”, not “snow”. It looked quite intimidating. Too much to put into my mouth. I threw away after days. Good experimentation though. If u love ice cream soda, maybe this recipe is for u. Just try to finish it up asap.


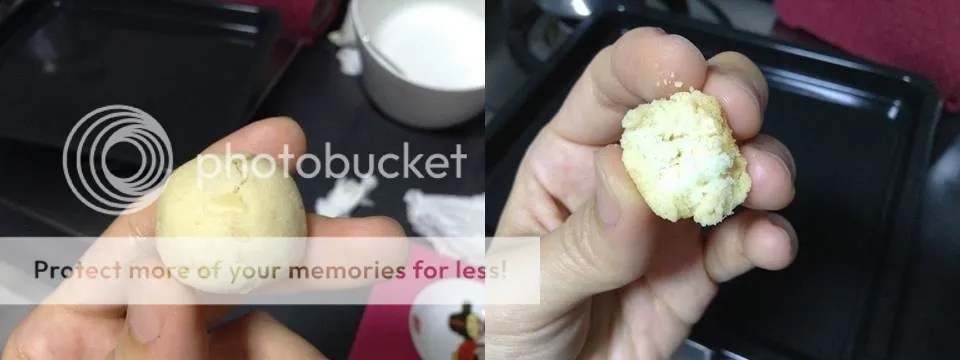
So soft it breaks constantly.. not the easiest-to-handle dough. Lots of pasting.

super soft dough

it was too soft to roll into nicer balls. Paste keep sticking to hands.

It was actually too soft to make a clean cut. Variation with cream cheese. Taste-wise, pretty good. Looks wise, a little intimidating? Coupled with the knowledge that ice cream soda was used. Too bold of me. The pink guava failed to produce a distinct pink colour. Should have used red jam?

Obviously with cream cheese. Maybe I should use similar colours for skin and paste so the cracks will be less obvious..

peach mould was easier to use for this recipe, as with the previous one.

As shown, days later, the mooncake leaks. The softer skin cracks easily, and could have allowed the paste to leak wet liquid.. but I do not think it is due to the red wine berry paste, as my previous batch of mooncakes using Alan Ooi’s recipe stayed dry and soft after days. Maybe it was condensation? I read from other blogs that u should store the mooncakes with a paper on top to prevent condensation from dropping onto the mooncake surface. Then again, it probably would not result in so  much leakage. Another possibility is the pink guava juice – but I did not see similar problems in other blogs which use juices. I wanted edible mooncakes, not something I would hesitate to put inside my mouth.

This is just for experimentation. Days after the mooncakes were made. Ice cream soda snowskin mooncake (left) vs Alan Ooi’s recipe snowskin mooncake (right). The ice cream soda mooncake is only slightly pink, hardly noticeable. The mooncake looks a lot softer overall. The snowskin ingredients seem to affect the paste too. It probably seeped into the paste, making it a lot softer and moist than the one on the right, which probably led to the leaking too.

Ingredients

90 g fried glutinous rice flour (koh fun)
10 g tang mien flour (wheat starch)
30 g shortening
40 g icing sugar
100ml ice cream soda
100ml pink guava juice
Filling: 420g red wine berry paste (divided into 30g each)

Variation: softened cream cheese 10g each + 20g filling

Some fried glutinous flour for dusting

Method:

  1. Sift koh fun, wheat starch and icing sugar.
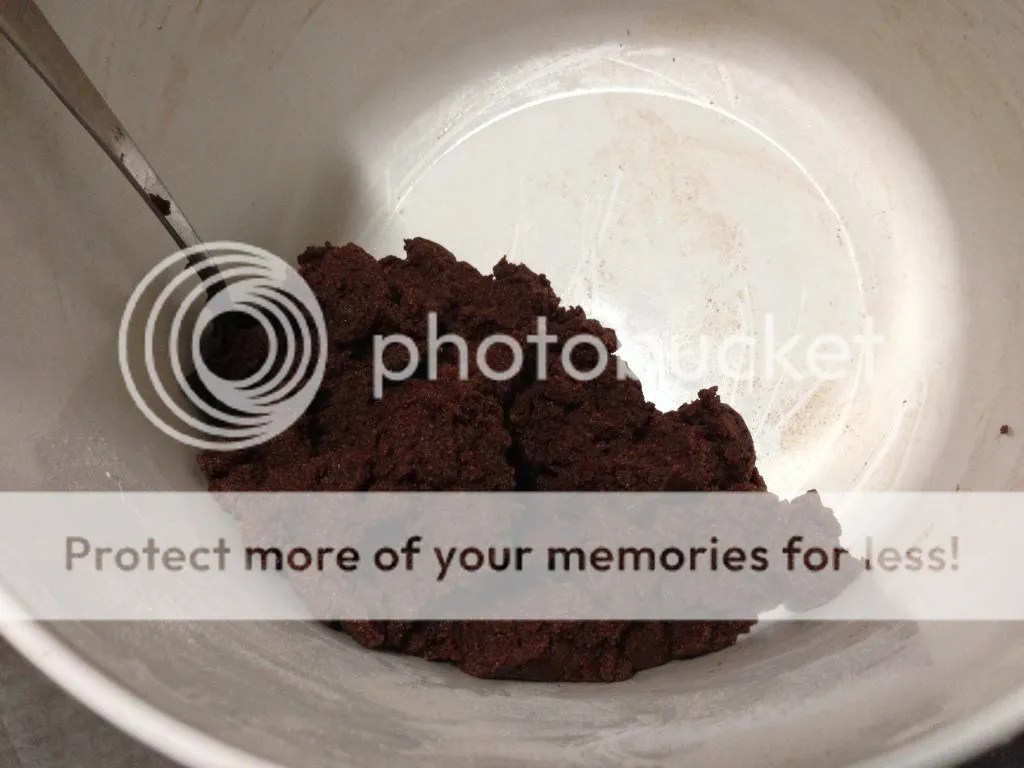
  2. Mix in shortening till resemble bread crumbs.
  3. Pour in ice cream soda and mix into dough.
  4. Divide dough into 25g each, roll into balls.
  5. Divide filling into 30g each, roll into balls.
  6. Flatten dough and wrap filling in it. Push into mould, taking care of edges.
  7. Store in air tight container in fridge.

Baking Class at Phoon Huat

I went for my very first baking class (after home econs lessons in secondary school) yesterday!

Have been baking for some time, cookies, cakes, scones, brownies, cheesecake.. Some turned out well, some not so good. I’ve always believed that anyone can bake. With google, it is even easier. Hence, I self-learned instead of going to baking classes. But I just wanted to try. I know some goodies are not meant for the amateur home baker. Let’s see what a baking class can bring. 🙂

Phoon Huat @ Sims Lane is just next to Aljunied MRT station, very convenient.

You will learn two recipes per lesson. Lessons will be taught almost everyday. Heard that the recipes taught will be changed every one to two weeks. Check their schedule & see what interests you. They also have demo workshops if you do not want to get your hands dirty. Booking is available from two weeks to one day before the lesson.

Phoon Huat Class Schedule

Our instructor was Patrick Pang. He does not smile much, but is knowledgeable, and imparts useful tips which differs slightly to the worksheet handed out. He went through the ingredient list, gives tips, and briefed us through the steps. After that, things will be moving fast. So listen carefully, bring a pen, so to maximise your learning.

I will not be updating the recipes until these two recipes are not taught for infringement of copyrights lol..

Here are the products.

Chocolate lava cake with salted caramel.

Hokkaido Milk Bread.

This was the spinoff of Hokkaido Milk Bread. The recipe taught was a basic soft bread recipe, and can be used for making other varieties – sugar roll, pork floss, otah, hotdog, cheese, whatever. The above was made with fruit pie filling, handmade by the instructor, not me. heh..

The lava cake was so heavenly.. absolutely delicious. Not too sweet as we used dark chocolate with 73% cocoa. The salted caramel pushes the oomph factor up many levels. Hokkaido milk bread was super soft and “bouncy”. It bounce back to its original soft and fluffy state no matter how you press it down. It was made using the Roux (Tang Zhong) method.

It was my first time making bread I think. Interesting. I also learnt how to roll the dough so it is nice & smooth.

Roll the dough like this!

You are expected to wash up your stuffs and clean your own tables. Some of the ingredients like roux, caramel and cocoa mixture were premade by the instructor to save time. But he would demo how to turn plain ingredients into heavenly concoction. Magic.

Overall, the lesson was fun and interesting. I learnt a lot! I love baking! 🙂